What is the Vulnerability Manager?
ControlCase Vulnerability Manager is a single repository for all Vulnerability related data and reports generated by various scans and penetration tests.
All the data from various scans – both internal and external vulnerability scans including PCI ASV Scans, Network and Application vulnerability scans and all penetration tests including Internal and External penetration testing and stored in the Vulnerability Manager.
The various individual findings are correlated to each other, duplicates eliminated, the best remediation advice from various sources is provided and false positives are eliminated through the Vulnerability Manager. The final results are provided in an easy to use interface that is very powerful. The interface allows for filtering, sorting, advanced query building to extract only the results that you need.
Vulnerability Manager also provides the ability to assign specific vulnerabilities to people, manage the process of mitigation and store evidences related to mitigation in the same repository.
Issues that have been marked false positives, stay that way for all subsequent scans, thereby making the ongoing management of scans must faster.
What can you do in the Vulnerability Manager?
- View all the vulnerabilities in a data grid
- Mark vulnerabilities as False Positive, Mitigated and PCI-DSS related
- Add “tags” to a group of vulnerabilities and view system assigned “tags”
- Assign vulnerabilities to users for remediation
-
Add or View remediation related evidences for vulnerabilities
Accessing the Vulnerability Manager
-
To access the Vulnerability Manager, you will need to log in to your portal (kbox) hosted by ControlCase.
If you do not know how to access the portal, please contact support. Also, if you do not have access to the Vulnerability Manager module, please let support know.
-
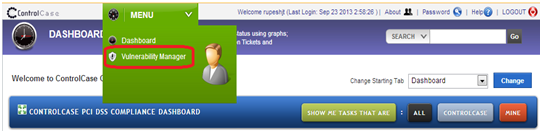
Click the “Vulnerability Manager” Link from Menu
-
The Vulnerability Manager module will look as shown below.
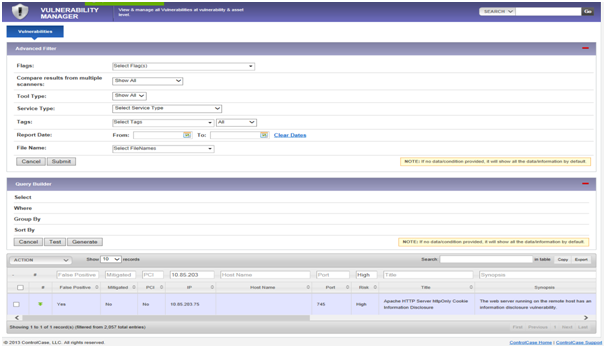
View and use the vulnerability data
-
SEARCH:
You can perform a global search and a search across multiple columns
-
SORT:
To sort across multiple column press SHIFT + LEFT CLICK on the column headers which you need to sort.
- Advanced Search:
The Advanced search and Query builder operations can also be performed on data grid 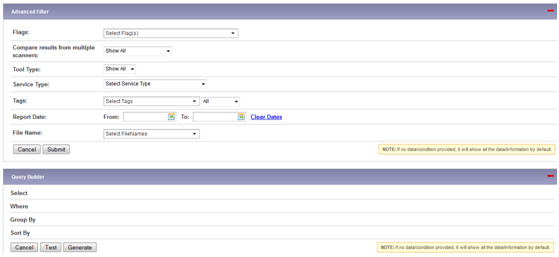
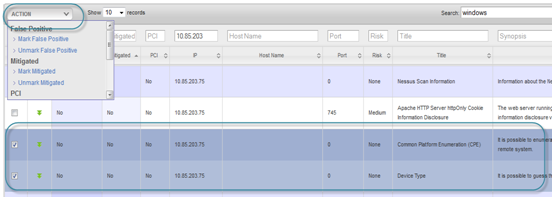
Mark vulnerabilities as False Positive, Mitigated and PCI
Vulnerabilities can be marked as False Positive, Mitigated or related to PCI compliance by clicking on the vulnerability and then by clicking on item in Action dropdown as shown below.
In the future, if the report file for next quarter is uploaded and if the particular vulnerability was previously marked as False Positive, Mitigated or PCI then the vulnerability from latest report will also be marked as False Positive, Mitigated or PCI.
This association is made on the basis of the combination of Vulnerability Name, CVE ID and the IP address or Host Name.
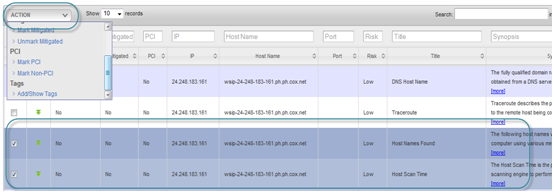
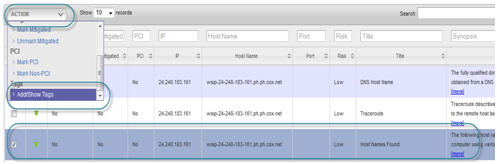
Tag vulnerabilities into groups
-
To add or Show the tags for the Vulnerability, click on the vulnerability and then click on Add/Show Tags in Action dropdown.
-
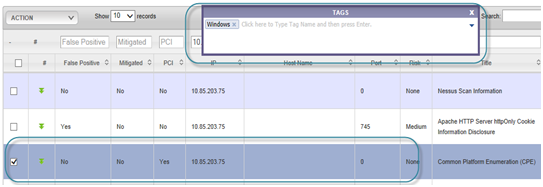
Vulnerabilities are assigned “system tags” by default, system generated tags are:
-
Windows, Linux, HP-UX, Cisco tag based on Operating System.
-
CVE tag if the vulnerability have a CVE ID.
-
False Positive tag if it was previously marked as false positive.
-
New tags can be added by typing in the TAGS box. Please see screenshot below.
-
If multiple vulnerabilities are selected then it will show the “union” of tags for all the selected vulnerability. If any new tag is added then it will be applied to all selected vulnerability.
-
Assigning vulnerabilities to users for remediation and view or upload evidence
- Click on the expand arrow as shown below.
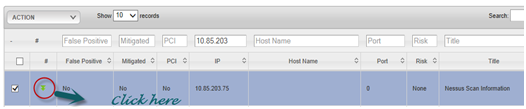
- The vulnerabilities can now be assigned to people or teams so that they can be addressed using the integration with ControlCase GRC Remediation module

- After entering the details of what needs to be done, an “Incident or Activity” is created within the Remediation Management module and a unique number is associated with this vulnerability
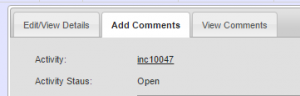
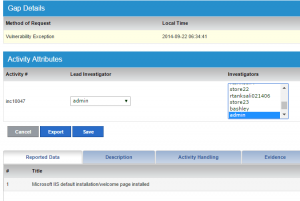
- Clicking on the Incident number (inc10047 in this case) takes you to the Remediation management screens where further details can be added, the issue assigned to people or teams for remediation
- A summary of the issue can be viewed through the “View Comments” tab

Leave a Reply!
You must be logged in to post a comment.