Installing Client Certificates to access the secure client portal (KBOX)
The Client Digital certificate will be provided to you (usually) via email as an attachment (usually with a .p12 extension).
Please save the attachment to your local hard drive (at a known location) before proceeding further.
Client certificates can be installed on your Windows PC in the following two ways:
1. By importing digital certificates into Microsoft Internet Explorer (IE)
2. By executing the certificate file
Installing Certificates by Importing Digital Certificates in Internet Explorer
Step 1: Open Internet Explorer (IE).
NOTE: Use IE 6.0 or higher.
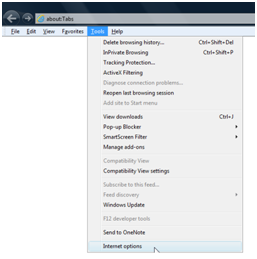
Step 2: From the Tools menu, click Internet Options.
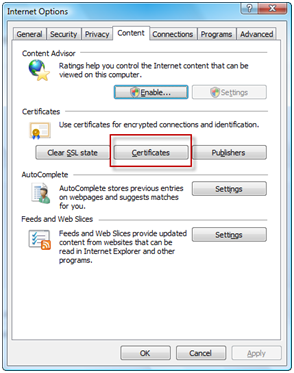
Step 3: Click the Content tab and click the Certificates button.
Step 4: Click the Import button.

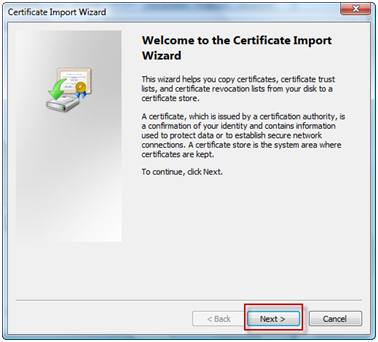
Step 5: Click Next.
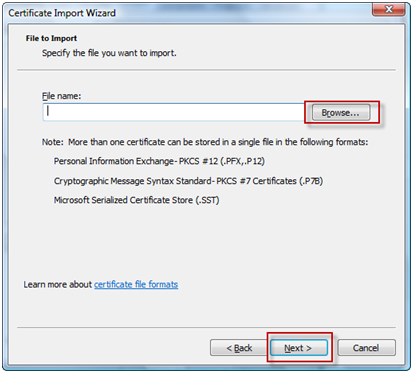
Step 6: Click the Browse button, locate the certificate that you had saved earlier and click Next.
Installing Certificates by Executing the Certificate File
Step 1: Locate the Client Cert File, either as the email attachment or as a saved file on your hard disk [The file has a .P12 extension].
Step 2: Using Windows Explorer, navigate to the .P12 file. Step 3: Double click the .p12 file.
Step 3: Click Next.
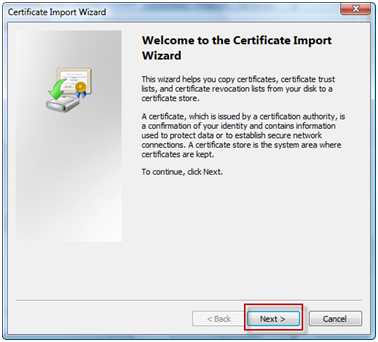
Step 4: Click the Browse button, locate the certificate and click Next.

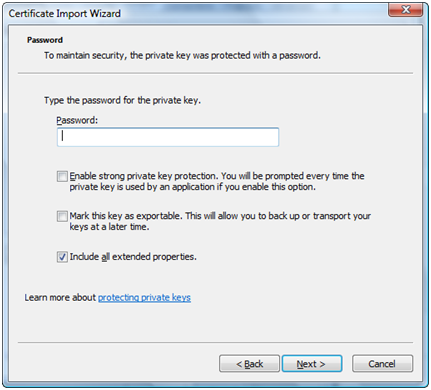
Step 5: In the Password box, enter the password provided to you by ControlCase managed services team and click Next.
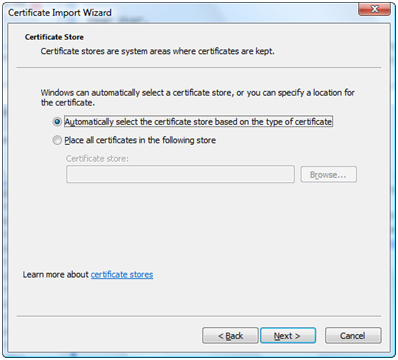
Step 6: Select the ‘Automatically select the certificate store based on the type of certificate’ option and click Next.
Step 7: Click Finish to complete the installation of Client Certificate.

Leave a Reply!
You must be logged in to post a comment.