CDD Node Agent Quick Start Guide
Index
- Firewall Rule Requirements
- How to download Node Agent
- How to get the Node Agent Activation key
- Installing Node Agent on Windows
- Installing Node Agent on MAC
- Installing Node Agent on Linux
- Configuring and Running a scan
Firewall Rule Requirements
Please open the firewall rule from Node Agent installation machine to access the below ControlCase API Server on port 443.
For more information on how to whitelist the API gateway URL check https://help.controlcase.com/kb/how-to-whitelist-the-controlcase-api-gateway-url/
• Non-EU environment: https://cs-api.controlcase.com
• Europe (EU) Environment: https://cs-api-eu.controlcase.com
How to download Node Agent
- Log in to SkyCAM portal.
- Navigate to Compliance Scanner module.
- Select the CDD application.
- Select the Endpoint to which you want to connect the Agent.

- Select the Scan options from the left-hand side menu.
- Select Advanced Settings option. Select the OS to Download Node Agent.

How to get the Node Agent Activation key
A. To install the Node agent, you will need the activation key. Follow the below procedure to get the Node activation key.
- Log in to SkyCAM portal.
- Navigate to “Compliance Scanner” module.
- Select the CDD application
- Select the Endpoint.
- Select the “Scan options” from the left-hand side menu.
- Select “Advanced Settings” option.
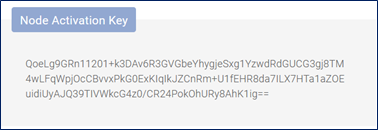
- Copy the Node Activation key.
Installing Node Agent on Windows
Node Agent installation requires the Activation key. Please see the section above to get the Activation key for installation. The installer supports the silent and interactive installation.
1. Prerequisites
- Please whitelist the following exes from the agent installation folder.
- CCAgent.exe
- CCconn.exe
- CCSearchIntegration.exe
- CCSearchIntegration64.exe
- The installer creates the scheduled task on the target machine. By default, scheduled task runs under the SYSTEM account. If we are using other service account to run the scheduled task. The account must have read, write, and execute permission on CDD installation folder.
- The user account must have the read permission on all files on the system to scan.
2. Silent Installation
- Copy the software on the target machine.
- Open the command prompt in administrative mode.
- Run the command CDD_Node_Agent.exe /S /KEY=”” (provide the key in double quotes).
- If you want to use the different service account (Other than SYSTEM), which will be used to run CDD scheduled task and node agent. Use the below command to specify the alternative credentials.
CDD_Node_Agent.exe /S /USERNAME=”domain\administrator” /PASSWORD=”xxxx” - By default, the agent gets installed in “Program Files” directory, if you want to change the installation location, use the below command.
- CDD_Node_Agent.exe /S /USERNAME=”domain\administrator” /PASSWORD=”xxxx” /D=D:\test
- CDD_Node_Agent_V1.0.exe /S /D=D:\test
- The installation log will be created in the installation directory.
- Notes:
- The command-line options are case-sensitive.
- /S – Runs the installer in silent mode
- /D – Specifies the installation directory. It must be the last parameter on the command line and must not contain quotes even if the path contains blank spaces. If you want to specify the root of the drive, then specify like “C:\”.
- /USERNAME and /PASSWORD – Optional (If not provided schedule task will be created under SYSTEM account).
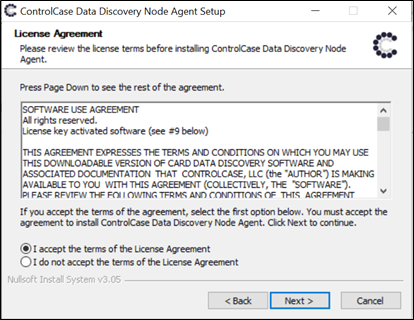
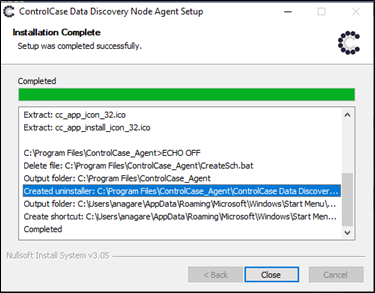
3. Interactive Installation
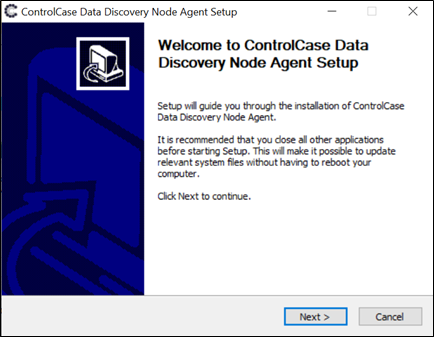
- Right click on the CDD executable and select the option “Run as administrator”.
- Software will unpack the installation files.
- Select “Next”
- Accept the license agreement and select “Next”
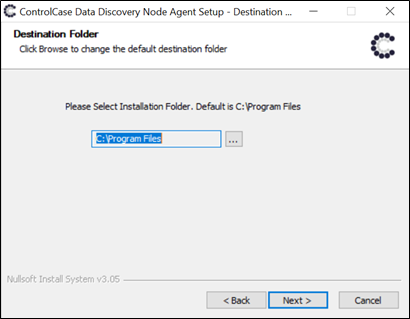
- Select the installation location.
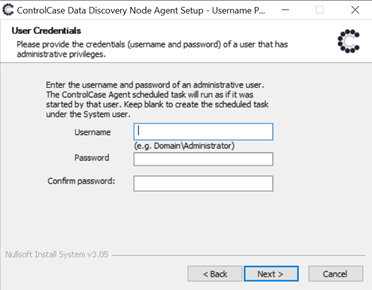
- Enter the credentials if you want to create the scheduled task under different account. By default, it will install and create the scheduled task under SYSTEM account.
- Enter the activation key.
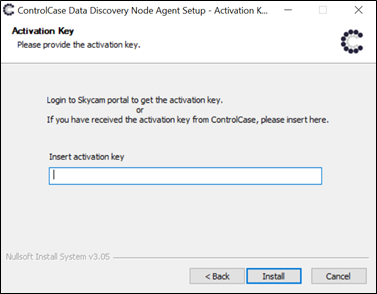
- Software will unpack the files and installs the software.
Installing Node Agent on MAC
1. Prerequisites
- User must have read/write and execute permission on the installation directory.
- User must have the execute permission to installation script.
- By default, CDD node agent installs the agent in the /Users/cdd folder.
- The user must have permission to schedule the Cron job.
- Agent installation requires the Cron package installed on the system. CDD node agent creates the Cron job on the system to run the Cron job every 5 minutes.
- Please whitelist the following executables on the Antivirus.
- CCAgent
- CCAgentResult
- CCSearchM
2. Installation
- Download the installer bundle
- Unzip the file using the tar command “tar -xvf CDD_Node_Agent_MAC.tar”
- Make the install script executable by running the command “chmod +x install.sh”
- Run the installer script “sudo ./install.sh –install ”
- The installer will check for the resources and install the CDD Node Agent.
- By default, agent will be installed under the /Users/cdd folder. Installer will create the folder and grant the read, write, and execute permission on the folder for the current user.
- The user executing the installer script must have sudo rights to grant the permissions on /Users/cdd folder.
Installing Node Agent on Linux
1. Prerequisites
- The user must have read/write and execute permission on the installation directory.
- The user must have the execute permission on the installation script.
- By default, the CDD node agent installs the agent in the /home/cdd folder.
- The user must have permission to schedule the Cron job.
- Agent installation requires the Cron package installed on the system. CDD node agent creates the Cron job on the system to run the Cron job every 5 minutes.
- The user must not be in the Cron.deny list and must present in the Cron.allow list.
- Please whitelist the following executables on the Antivirus.
- CCAgent
- CCAgentResult
- CCSearchX64
- libcrypto.so.1.1
- libssl.so.1.1
- Note: On some Linux distributions, Cron may not be installed. Please check if the Cron is installed before installing the Node Agent.
2. Installation
- Download the installer bundle
- Unzip the file using the tar command “tar -xvf CDD_Node_Agent_Linux.tar”
- Make the install script executable by running the command “chmod +x install.sh”
- Run the installer script “sudo ./install.sh –install ”
- The installer will check for the resources and install the CDD Node Agent.
- By default, agent will be installed under the /home/cdd folder. Installer will create the folder and grant the read, write, and execute permission on the folder for the current user.
- The user executing the installer script must have sudo rights to grant the permissions on /home/cdd folder.
Configuring and Running a scan
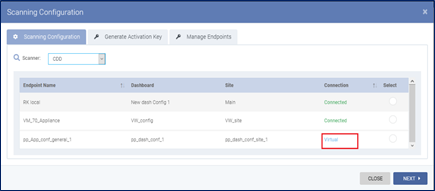
There are 2 types of Endpoint you can create on the SkyCAM portal depending on the need of scanning and environment.
- Virtual Endpoint: You can only configure and run scans for CDD Node agents using this type of Endpoint.
- Regular Endpoint: You can configure and run scans for CDD Node agents and Assets accessible for CDD Endpoint. This endpoint supports other types of Asset scanning like Databases, Exchange server scanning etc. as well. It requires a windows machine in client environment to install the CDD Endpoint.
1. Virtual Endpoint – Configure and Run Scan
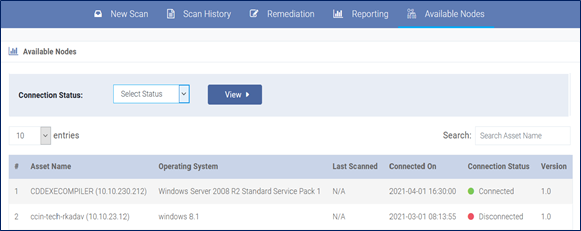
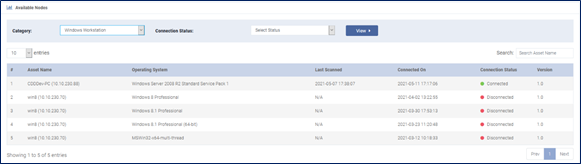
- You can check the list of Node agents by selecting the “Available Nodes” option from the top menu. Only the agents which are connected at least once to the Cloud will be displayed.
- To configure the new scan for available nodes.
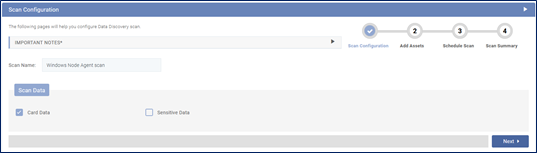
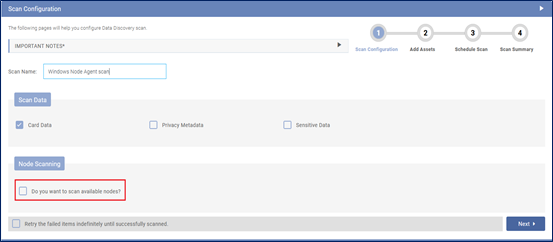
- Select the “New scan” from the top menu.
- Enter the scan name.
- Click on “Next”.
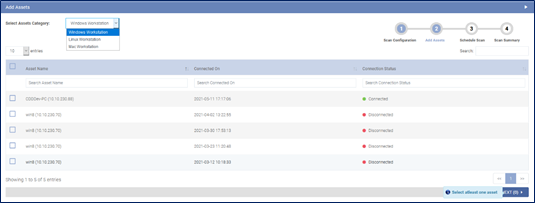
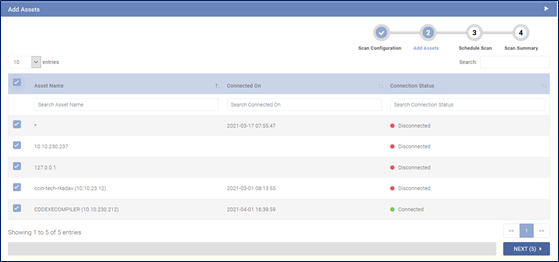
- In the “Add Assets” section, select the Assets and click on “Next”
- Select the “Schedule scan” option if you want to schedule the scan to start later.
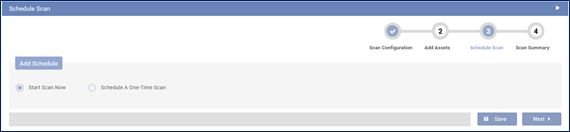
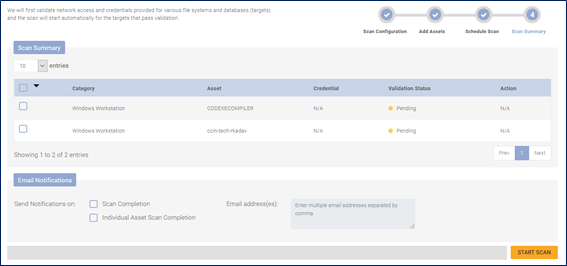
- Check the scan summary and click on the “Start scan” button to start the scan.
2. Regular Endpoint – Configure and Run Scan
- You can check the list of Node agents by selecting the “Available Nodes” option from the top menu. Only the agents which are connected at least once to the Cloud will be displayed.
- To configure the new scan for the available nodes.
- Select the “New scan” from the top menu.
- Enter the scan name.
- Select the option “Do you want to scan available Nodes?” and Click on “Next”.
- In the “Add Assets” section, select the Assets and click on “Next”.
- Select the “Schedule scan” option if you want to schedule the scan to start later.

- Check the scan summary and click on the “Start scan” button to start the scan.

Leave a Reply!
You must be logged in to post a comment.